There isn’t much time left before Windows 7 of considered End of Life by Microsoft. In fact, we are a little under one week away from the official deadline. However, all hope is not lost, you can STILL upgrade to Windows 10 for FREE in 2020.
Yes, this is real, and I have no idea why Microsoft isn’t pushing this information more widely. Needless to say, this guide will help you upgrade from Windows 7, Windows 8, Windows 8.1 to Windows 10 using an official Microsoft Tool and will result in a completely legal and valid license.
The Setup - Download the Windows 10 Media Creation Tool
Navigate on over to: https://www.microsoft.com/en-us/software-download/windows10 and download the Windows 10 Media Creation Tool.
In order to avoid complexities, do this from the computer you want to upgrade. It will make this process much easier.
Please note you will need an active internet connection multiple times during the upgrade process. It’s best to do this at home and not over spotty WiFi.
Getting everything rolling - Using the Media Creation Tool
At this point, you need to launch the Media Creation Tool (downloaded previously) and begin choosing how you would like to upgrade the computer. Included below are the screens you should see as you go through the upgrade process.
Please understand that Microsoft updates this tool regularly so some of the screens may change when you decide to perform this upgrade - for the most part, the instructions should be similar enough that you can read and understand what is being asked.
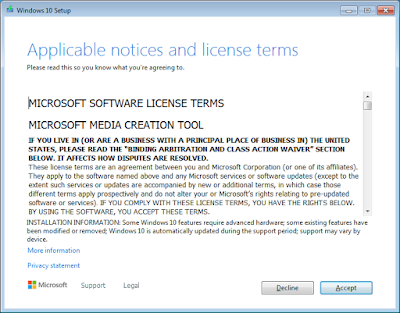
Accept the EULA
Choose “Upgrade this PC now” - This will perform an in-place upgrade of your Windows 7 computer to Windows 10
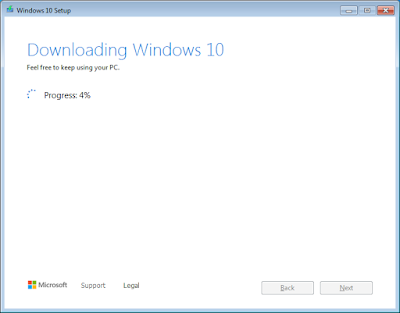
Wait for the Windows 10 Setup files to download from Microsoft (Internet connection required). Multiple automatic steps follow this. Just let the tool continue running until you reach a screen requiring user input (these steps will take some time to complete).
Accept a second EULA for Windows 10
Wait for some additional automatic steps to run
Ensure your screen says you will “Keep personal files and apps” - This will ensure everything from Windows 7 will transition cleanly over into Windows 10. Then click Install.
From this point, the tool will takeover your entire screen and will begin working on the upgrade process. Please note, this process will take a few hours on older computers. Feel free to walk away from your computer and come back later to check progress.
Final touches - Configuring initial Windows 10 settings and you’re done
Let’s get this upgrade finished up. This section will be similar to the last section, heavy on pictures. Explanations will be under each image.
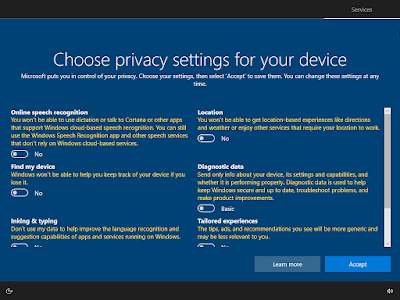
Select your preferred privacy settings - I typically turn everything to the “off” position which gives you the most privacy. But feel free to read each option in its entirety to choose what suits your needs best.
From here, you should be dropped directly into the Windows 10 desktop.
Let’s quickly confirm your Windows 7 license was correctly migrated to Windows 10. Perform the following:
- Right click on the Windows icon (bottom-left of your screen)
- Click Settings
- In the search bar, type “activation” and select “See if Windows is activated”
- You should see that “Windows is activated with a digital license”
That’s about it
Your Windows 7 PC should now be running a valid copy of Windows 10 in 2020 for free.
As always, thanks for reading this far down. If you have any questions feel free to post them as a comment below or get in touch with us directly via our contact page: https://www.marptech.com/contact
See also
- Do you need anti-virus software anymore?
- Windows 10 Start-Up Repair/Recovery - How to fix your Windows 10 PC when it fails to boot
- Windows System Restore And You - Or how to deal with Windows Updates that broke your computer
- Windows 7 End of Life - What does that mean?
- Tech Tips: Securely Factory Restore Windows 10


